Now let's start
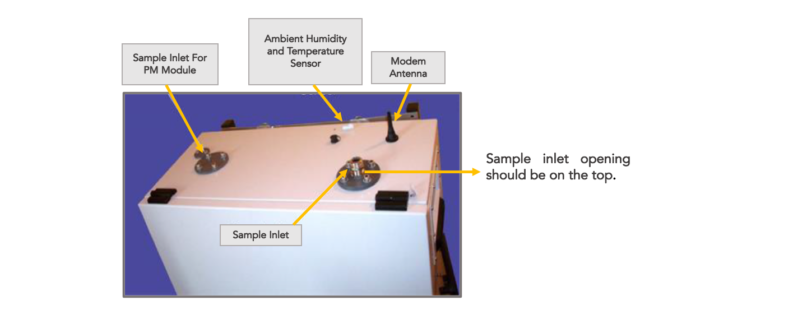
1) The device should put in an upright position (e.g. the name ‘airpointer ’ is readable and the sample inlet opening is on the top.
2) Open the main door and check for internal shipping damage.
3) Included with airpointer there is a printed record of the final performance characterization performed on your instrument at the factory.
! The included printed record is an important quality assurance and calibration record for this instrument. Please preserve it.
4) Check the interior of airpointer to make sure all circuit boards and other components are in good
shape and properly seated.
5) Check the connectors of the various internal wiring harnesses and pneumatic hoses to make sure they are firmly and properly seated. Verify that all optional hardware ordered with the unit has been installed. These are checked on the printed list shipped with the analyzer.
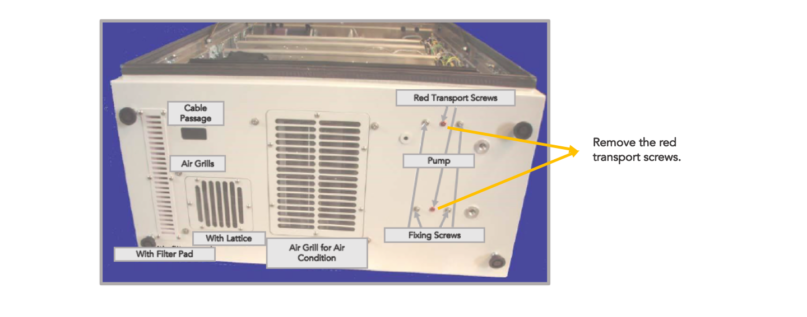
6) After making sure that there is no shipping damage exits, remove the two red colored shipping screws from the bottom of the pump from the outside of the airpointer before you switch on your airpointer. DO NOT reach inside the ventilation blades of the pump! Save these shipping screws.
! Close the main door and secure the airpointer if necessary.